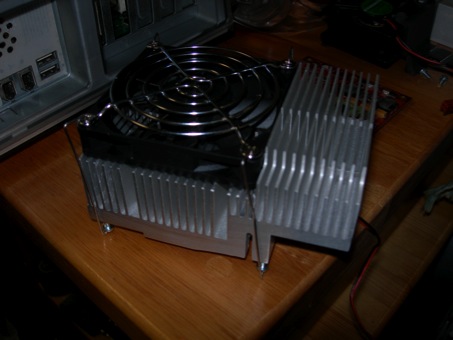
Heatsink Mod for Powerlogix CPU Transplant
 
So, here’s the story:

Once upon a time, I bought a 2.0GHz Powerlogix 7447A processor upgrade for my Sawtooth.
Well, after 4 years of faithful service, I grew weary of the same ol’ excellent performance that the machine gave me.
Since I had all these Quicksilver machines around, and since transferring the processor would allow me to use one of my Geforce 6800 GT cards with the processor (gotta’ help Doom 3 and Prey, right?) , I decided, OK, I’m gonna’ gut the Sawtooth......

Easy, right? After all, the 7447A processors work in any G4, so no bus speed worries.

OK, first things first.
The firmware needs patched.
Easy stuff, except that the CD that I haven’t used in 4 years is nowhere to be found!!!
I found other crap that I thought I had thrown away years ago, but no CD.
Arrrrgh!

Quick, email OWC, and ask for the software........ BEG, if necessary!
Thankfully, the great folks of OWC sent me a link to download that software, and I was able to burn it to disk (more trials there, but I’ll spare the details), and get the firmware of the QS machine flashed.

Right. Let’s get dirty.
Pull plugs, cords, connectors.
Clear counter space and kick debris from underfoot.
Out of the Sawtooth comes the Powerlogix processor.

So far so good.

Push everything aside, and open up the QS.
Rip, unclip, and out comes the old processor.

Looking good.....

OK, line up the CPU connector and socket and.... AND..... AND

OMG!!!! IT DOESN’T FIT!!!!!

That’s right, folks, REMEMBER that the heatsink on 7447A Powerlogix processors is an “either or” kinda’ deal.
The heatsink for the 100MHz bus machines doesn’t fit the 133MHz bus machines due to CPU socket location change on the logic board, and the resulting lack of room for the heatsink due to the board layout.
The Powerlogix heatsink for 133MHz machines is a different shape entirely.....

Not to be defeated, I decided that an old QS 800MHz heatsink that I had lying around would work.

But the contact pad of the heatsink won’t line up with the CPU chip...
And how am I going to connect the heatsink to the card....
And there are so many clearance issues, is it really possible?

I didn’t say it would be easy, but dammit, it will work...... Stop whining and think!!

First, the QS heatsink will only work if turned 180º from it’s original position due to pad offset and differences in the two daughter cards..
This puts the stepped portion of the stock heatsink over the RAM.
Once I determined that the heatsink wouldn’t hit the RAM, I started cutting.

First, I had to make some clearance provisions on the heatsink for details on the board, as well as make provisions for connecting the heatsink to the daughter card with screws, instead of clips. 
(I will spare you the details of how I made this, as I don’t want to be responsible for your finger loss or other physical injury.)
Here is a picture of the end result.
All clearance (3.5 mm thickness removed) and connection provisions (9 mm holes for screws to fasten daughter card) have been made, with a bit of needed ventilation added.
Filings have been blown away, washed off, and the aluminum polished up a bit, with extra attention to the CPU mating surface.

Next, I figured that even though the QS heatsink has more aluminum (544 g. vs. 287 g.), fin surface area is more than double the Powerlogix heatsink, so the old 80 mm x 15 mm should suffice.

Easy, right?
If you think so, then you obviously haven’t been paying attention.....

A test fit of the CPU/heatsink shows that although the clearance problems on the daughter card and the area surrounding the heatsink are cleared, there are only millimeters between the top of the heatsink and the PSU when the case is closed.

I want a fan. I NEED a fan. OK, time to cut fins......

Here is the result of my labor.
AND, a 80mm x 80mm x 15mm fan fits nicely:

Now, I have to connect the fan.......
What to do... what to do.... Hint: 1 mm stainless steel rod.
After a bit of bending and cutting, the following resulted:

And, with a bit of fine tuning, they work nicely (I mean zero movement) to hold the fan on the CPU heatsink assembly:

Now it’s all academic, with a simple assembly of the components.
AND, GUESS WHAT!?!?! 
IT FITS!!!!


I told you that the RAM clearance was a worry.
Low profile DIMMs are a MUST!
Everything clears, though.
Another view:

(Nice spacers, huh? Oh, yeah, I forgot to mention, this is on a budget. NO budget, that is....)
But, the test fit shows better contact, with a cleaner thermal compound smear than that of the original heatsink.

It’s gonna’ work!!

So, after all this, I boot up into 10.4.8, so that I can use CPU Director to check the temperature of the new assembly.

All that I can say is, 
I’m good!!

No heat worries at all.
The new assembly keeps the CPU 4ºC cooler than the original assembly in the Sawtooth, while the CPU is loaded with a Computer vs. Computer Chess game.
(Trust me, this is an excellent way to load test your CPU).
Further testing has shown that cooling isn’t a problem at all.
Doom 3, Prey, UT2K4, CoD2, etc., all have shown that my efforts were worth it!

Due to the mass of the aluminum heatsink, the temperatures don’t fall as fast as before.
What is important, though, is peak temperatures are cooler than before.

Bottom line is, this experiment worked, and didn’t require out of pocket expenditures.
Later, I’ll spend some money and see if I can adapt a Scythe “Big Shuriken” (or similar) low profile CPU cooler to get even better cooling.

Now, time to stuff it full of all the other bits and pieces that I have, and see what this baby can do!

Maybe I can even overclock this thing?????


To be continued.....
../Processors.htmlshapeimage_1_link_0
OMG! It won’t fit!!!!!
(yeah, like that would stop me....)
Saturday, January 16, 2010